This article is the second one of a series showing how to use cloud-computing in media and entertainment (M&E workflow).
The first article explained you how to complete a very basic setup of your AWS infrastructure and create a bastion/jump server.
 Now, we will discuss how to configure our bastion server to launch new instances without using the AWS console with the power of salt-cloud.
This new instance will be used in article 3 for transcoding and encoding application.
Contents
AWS Console
Get a pair of API credentials
In order to manage our VPC outside the console, we need to request credentials on our console.
To request them, go into your AWS console, click on your name, and select Security Credentials
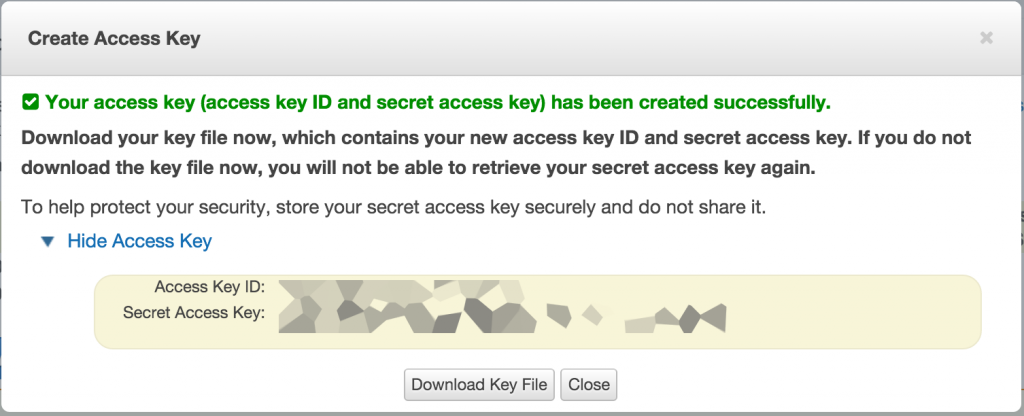
Click on Create new access key and expand with Show access key

Note your ID and secret key somewhere, you will need them later.
Bastion configuration
Copying our key
Now let’s go on the heart of our subject.
We will need the key we have generated in the previous article on our aws console. This key will be the default key deployed by salt-cloud when you launch an instance. Go in the directory you stored it, we will copy it to our bastion server by using scp. Copy it from your local computer:
scp yourkey.pem user@your_bastion_ip:/home/user/yourkey.pem
Log in the bastion instance we deployed in the first article
ssh msol@ip-of-our-bastion
Let’s use the root account:
sudo -i
If you didn’t follow the first article and you need quickly to get the packages up and running you just need to run these commands:
wget -O - https://repo.saltstack.com/apt/ubuntu/14.04/amd64/latest/SALTSTACK-GPG-KEY.pub | sudo apt-key add -
echo "deb http://repo.saltstack.com/apt/ubuntu/14.04/amd64/latest trusty main" > /etc/apt/sources.list.d/saltstack.list
apt-get update
apt-get install salt-master salt-cloud
Now we wil copy the key we previously put in our home directory in the salt config directory
cp /home/msol/yourkey.pem /etc/salt/yourkey.pem
Configure the cloud providers
We will edit our cloud providers config. The cloud providers contain the information salt needs to deploy an instance not only on Amazon, but on every other provider. In our case we will just configure it for Amazon.
This file contains information about our AWS account such as ID, key, our default security group, in which zone we want to deploy, etc.
For example, if we want to change the location of our instance, we would just replace the availability_zone variable.
Please replace with your credentials, your private key (the one we generated in the last article), our salt master (the IP of our bastion) and our keyname.
Create and edit the file in /etc/salt/cloud.providers.d/aws-us-west-2.conf
ec2-us-west-2-private:
  minion:
    master: BASTION_PUBLIC_DNS
  id: YOUR_AWS_ID
  key: ‘YOUR_AWS_KEY'
  private_key: /etc/salt/YOUR_KEY.pem
  keyname: YOUR_KEYNAME
  ssh_interface: private_ips
  securitygroup: launch-wizard-1
  location: us-west-2
  provider: ec2
  del_root_vol_on_destroy: True
  del_all_vols_on_destroy: True
  rename_on_destroy: True

ec2-us-west-2-public:
  minion:
    master: BASTION_PUBLIC_DNS
  id: YOUR_AWS_ID
  key: 'YOUR_AWS_KEY'
  private_key: /etc/salt/YOUR_KEY.pem
  keyname: YOUR_KEYNAME
  ssh_interface: public_ips
  securitygroup: launch-wizard-1
  location: us-west-2
  provider: ec2
  del_root_vol_on_destroy: True
  del_all_vols_on_destroy: True
  rename_on_destroy: True
Configure the cloud profile
This file contains a template for each type of Amazon instance. You can choose the base image you want to use, the size, and the default username. In our case we will continue to use ubuntu. The following file contains a template for every instance size, you don’t need to modify it:
Create the file in /etc/salt/cloud.profiles.d/aws-us-west-2.conf
base_ec2_micro:
  provider: ec2-us-west-2-private
  image: ami-5189a661
  size: t2.micro
  ssh_username: ubuntu
  tag: {'Environment': 'production'}
  grains:
    environment: production
  sync_after_install: grains

base_ec2_small:
  provider: ec2-us-west-2-private
  image: ami-5189a661
  size: t2.small
  ssh_username: ubuntu
  tag: {'Environment': 'production'}
  sync_after_install: grains

base_ec2_medium:
  provider: ec2-us-west-2-private
  image: ami-5189a661
  size: m3.medium
  ssh_username: ubuntu
  tag: {'Environment': 'production'}
  sync_after_install: grains

base_ec2_large:
  provider: ec2-us-west-2-private
  image: ami-5189a661
  size: m3.large
  ssh_username: ubuntu
  tag: {'Environment': 'production'}
  sync_after_install: grains

base_ec2_xlarge:
  provider: ec2-us-west-2-private
  image: ami-5189a661
  size: m3.xlarge
  ssh_username: ubuntu
  tag: {'Environment': 'production'}
  sync_after_install: grains

front-end_ec2_micro:
  provider: ec2-us-west-2-public
  image: ami-5189a661
  size: t2.micro
  ssh_username: ubuntu
  tag: {'Environment': 'production'}
  sync_after_install: grains

front-end_ec2_small:
  provider: ec2-us-west-2-public
  image: ami-5189a661
  size: t2.small
  ssh_username: ubuntu
  tag: {'Environment': 'production'}
  sync_after_install: grains

front-end_ec2_medium:
  provider: ec2-us-west-2-public
  image: ami-5189a661
  size: m3.medium
  ssh_username: ubuntu
  tag: {'Environment': 'production'}
  sync_after_install: grains
Launch a new instance with Salt-Cloud
Now to launch a new instance from your bastion is very simple. You just need to use the salt-cloud command, it uses the following syntax:
salt-cloud -p INSTANCE_TYPE INSTANCE_NAME
Let’s run
salt-cloud -p base_ec2_micro transcoding
And for example, if we wanted to launch this instance with a bigger profile we would have done:
salt-cloud -p base_ec2_large transcoding
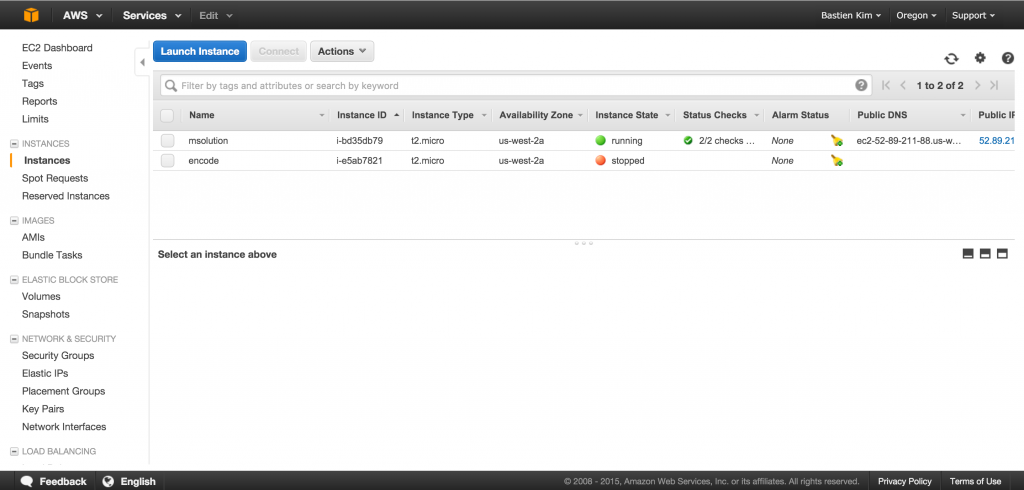
After a few seconds, our new instance is set up. It will appear in our AWS console:

Add a rule to change hostname
Let’s add a rule so salt can change the hostname based on the minion id. We will create this rule in /srv/salt/generic/hostname.sls
/opt/update_hostname.sh:
    file.managed:
        - source: salt://templates/update_hostname.sh
        - mode: 775

update_hostname:
    cmd.run:
        - name: /opt/update_hostname.sh
        - require:
            - file: /opt/update_hostname.sh
And add the following script in /srv/salt/templates/update_hostname.sh
#!/bin/sh
cat /etc/salt/minion_id | cut -d'.' -f 1 > /etc/hostname
Check and connect our new instance
Now to be sure that our instance has been correctly deployed, we can run the following command from our bastion:
salt '*' test.ping
This command will ping our minions. You should get an output like this:
transcoding:
    True
It means that it’s started. Now let’s try to access to it with the key we specified and the default ubuntu user. You can find the assigned IP in the previous output of salt-cloud or on your AWS console.
ssh -i /etc/salt/ourkey.pem ubuntu@ip-of-new-instance
The connection should now be established, but we must deploy our base configuration.
Deploy configuration on the new instance
With salt it’s very simple, on the transcode host you can run the following command as root:
salt-call --local state.highstate
Or you could have used from the bastion host this command:
salt '*' state.highstate
Our configuration should now be deployed. Try to login with the user we previously put in the salt:
su -i msol
And let’s try to login with our ssh key (I assume that you’re using the same key on your local computer and your bastion).
Go back on bastion and run:
ssh msol@transcoding
You should see your prompt (with the bash configuration we did in the previous article)
msol@transcoding ~ $
Congratulations!
Next!
Now that you are mastering the basics of salt, we will use our skills in the third article in a concrete application for M&E: how to run transcoding jobs in our AWS VPC!

